Quest 2 thumbstick drift is a frustrating issue that wrestles control from the user and can make it nearly impossible to play games. Drift can be caused by dirt getting inside the thumbstick mechanism and be resolved by cleaning it as we go through in this guide.
If cleaning does not work then your drift might be caused by wear and tear, in which case you’ll need to either replace your controller or replace the thumbstick. Replacing the thumbstick is the cheapest option when compared to getting a new controller - with a decent kit like this one setting you back just $20.
However, before you try anything you may want to try is contacting Quest Support. Open a ticket with the support team and they might be able to assist by giving advice or offering to service your controller. If that doesn’t work for you then you might want to try cleaning dirt from the thumbstick mechanism or replacing it.
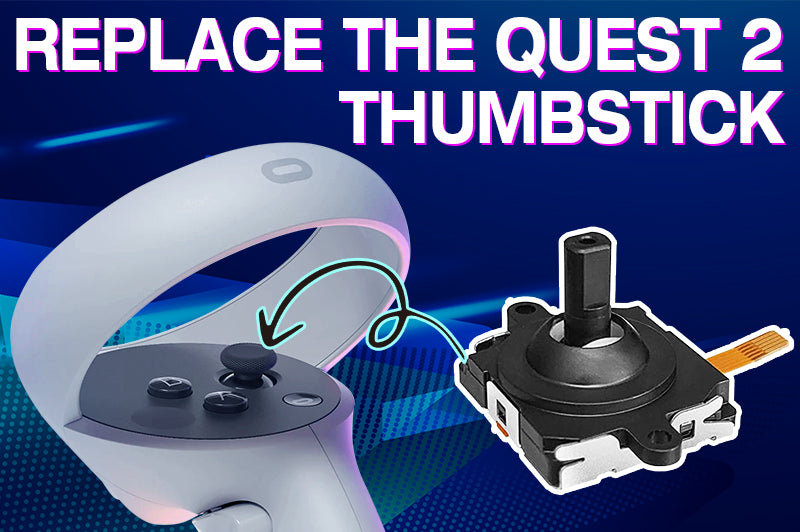
Replacing The Quest 2 Thumbstick
To do this fix you’ll need a new thumbstick, a T5 Torx screwdriver bit, needle nose tweezers, a prying tool/flat-edged screwdriver, and a Stanley knife. Alternatively, a kit like this one contains everything you need.
Steps To Replacing Thumbstick
- Remove the battery cover and battery.
- Peel off the sticker inside the battery compartment to reveal the screws underneath.

- Using a Torx T5 screwdriver bit - remove the screws from the handle.
- Note: three screws are pictured here but the number of screws varies. Make sure to remove all screws from the handle, however many there are.

- Handy tip: place the screws on a piece of paper and label where they go to make it easier to re-assemble the controller later on.

- Create a gap underneath the black plastic disc on the face of the controller using a thin, sharp rigid tool such as a Stanley knife or something similar.
- Once a big enough gap has been made, insert a thicker tool into the gap like a flat-head screwdriver and begin to pry.
- The black disc is attached via a sticky adhesive material and plastic pegs so t ake your time working the tool around the edge of the disc - gently but firmly prodding and prying underneath.

- After some time the disc should eventually come off the controller.
- Note: Patience is key to doing this part without breaking anything on the controller. Try not to pry too forcefully as it could cause damage.

- Remove the thumbstick cap by getting it in a pincer grip between your thumb and fingers then pulling firmly.

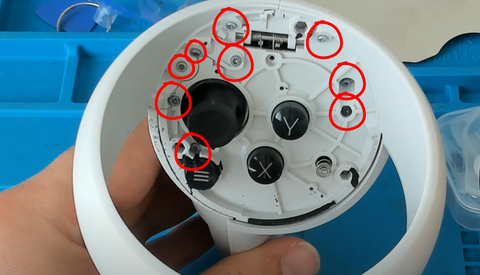
- Remove the nine screws from the controller's face using your T5 screw bit.
- Note: A screwdriver with a short handle (like the one that comes with the suggested kit) is useful here so that you can get to the screws without the tracking ring getting in the way.
- Use a tool like a screwdriver to push the plastic notch on the inside of the tracking ring.
- Whilst the notch is depressed, use your fingers to grab the lip of the controller ring where the two sides of the ring join and pry.
- Work your way around the outside of the tracking ring, prying as you go, until the ring shell is removed completely. This will expose the tracking LEDs inside the ring - take care not to damage these.
- Note: the tracking ring shell is held on by a little adhesive that shouldn’t cause too much trouble when taking it off.


- Inside the handle is a plastic locking mechanism holding the two sides together.
- To pull the handle apart - exert upward pressure on the battery side of the handle whilst exerting downward pressure on the side of the handle with the grip button. Then pull the two sides away from each other to separate them.


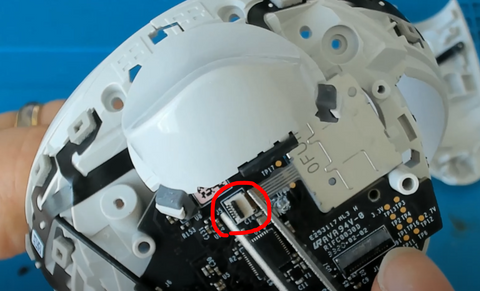
- The top of the controller is attached to the handle via a ribbon cable.
- Taking a tool like a pair of needle nose tweezers, flip up the black latch to release the ribbon cable.


- You’ll also find a ribbon cable connecting the joystick to the motherboard.
- Flip up the black latch to release the joystick ribbon cable in a similar way to the previous step.
- Remove the four screws that attach the motherboard to the controller.
- Note: do not remove the motherboard.

- Lift the motherboard just enough to pull out the thumbstick mechanism.
- Note: lifting the motherboard too high may cause a button to come loose and need to be put back.

- The original thumbstick mechanism should have a spring that sits atop it.
- Place that spring on top of your new thumbstick - making sure it is aligned properly, with the rounded edge closest to the thumbstick ribbon cable.

- Lift the motherboard just enough to insert the new thumbstick.
- Re-insert the four screws from the motherboard and make sure the buttons and thumbstick look and feel okay.


- Insert the joystick ribbon cable into the motherboard and secure it in place by closing the black latch.
- Follow the disassembly steps in reverse to re-assemble the controller with your new thumbstick.

If you’ve followed all the above steps carefully your thumbstick should be as good as new and drift-free!

As a company dedicated to providing innovative and original content, we pride ourselves in also working with influencers that amplify this dedication. Therefore we are honored to collaborate with Tony from VR Reviews helping us to share the latest virtual reality news on our website, please click the image below to find out more.
